Author: LEDJ EDEL

  • Motorcycle Luggage Packing & Weight Distribution Guide (2026)

    Motorcycle Luggage Packing & Weight Distribution Guide (2026)

    Embarking on multi-day touring trips through tight mountain passes requires carrying extra gear, tools, and personal supplies. Proper motorcycle luggage packing and weight distribution for mountain stability is critical to maintaining predictable cornering, stable braking, and effortless turn-in on steep switchbacks. Overloading a top case or packing side panniers unevenly drastically alters your motorcycle’s center of gravity, causing front-wheel light-headedness, high-speed weave, and dangerous wallowing through technical bends. Mastering heavy-item placement ensures your suspension operates effectively across Virginia’s mountain corridors.

    Weight Distribution Dynamics & Packing Hierarchy

    Understand how gear placement directly impacts motorcycle geometry and cornering stability:

    Packing Zone / PositionRecommended Gear TypesImpact on Center of Gravity (CoG)Stability Risk if Mismanaged
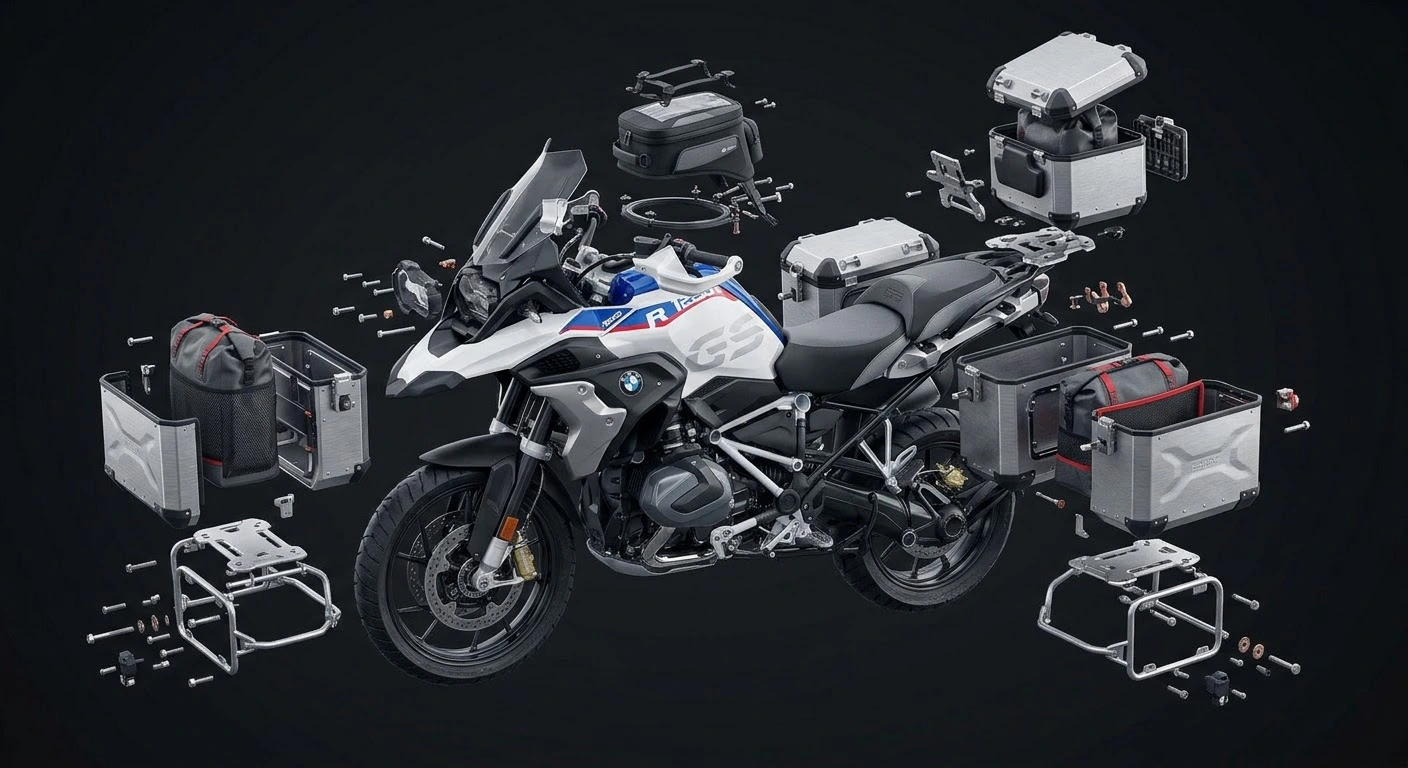
    Tank Bag (Lowest & Central)Heavy items: tools, spare batteries, tire repair kitLowers CoG; improves front tire tractionSteering resistance if excessively heavy
    Side Panniers (Low & Forward)Clothing, camping gear, fluids split evenlyKeeps weight centered near swingarm pivotHigh-speed wobble if left/right weight is uneven
    Top Case / Tail Bag (High & Rear)Lightweight gear: sleeping bag, rain suit, jacketElevates CoG; lightens front-wheel gripHandlebar shake & severe rear suspension sagging

    Step-by-Step Packing Rules for Mountain Cornering

    Applying strategic packing physics before setting out preserves machine handling and chassis geometry:

    • 1. Keep Heavy Items Low and Centered:
      Place heavy steel tools, spare fluids, and tire pumps inside a tank bag or at the very bottom of side panniers close to the bike’s centerline. Storing heavy equipment low prevents lever action that destabilizes the bike when leaning into sharp switchbacks.
    • 2. Balance Pannier Weight Left-to-Right:
      Use a portable luggage scale to verify that side panniers carry nearly identical weight. A weight imbalance of just 5 to 10 pounds between left and right panniers causes subtle chassis pulling, forcing constant counter-steering correction through sweeping mountain curves.
    • 3. Avoid Overloading the Rear Top Case:
      Top cases sit far behind the rear axle and elevated above the seat line. Limit top case contents to light, bulky items like rain gear or sleeping pads. Overloading the top case lightens front-end mechanical grip, inducing front wheel drift during uphill acceleration.
    • 4. Adjust Rear Suspension Preload for Payload:
      Adding 30 to 80 pounds of luggage compresses rear suspension sag. Increase rear shock preload settings according to your owner’s manual to restore original chassis geometry, maintain proper headlight aiming, and prevent cornering clearance loss.

    Before packing for long multi-day mountain routes, inspect your electrical setup with motorcycle battery care and troubleshooting in cold and hot weather touring. Ensure your drive system is fully prepped using how to clean, adjust, and lube your motorcycle drive chain on long road trips. Additionally, check your tire pressures against extra payload using motorcycle tire pressure and tread maintenance for mountain curves and slick asphalt.

    Conclusion: Centered Mass, Uncompromised Handling

    Mastering motorcycle luggage packing and weight distribution for mountain stability guarantees that carrying tour gear does not ruin your riding enjoyment. Keep heavy objects low and forward, balance pannier loads precisely, and tune your suspension preload before departing. With a balanced payload and low center of gravity, you will carve through Virginia’s mountain switchbacks with smooth precision and complete confidence.

    Legal Disclaimer: This guide is provided for educational and luggage packing guidance only. Always consult your motorcycle owner’s manual for maximum Gross Vehicle Weight Rating (GVWR) and individual rack weight limits.

    Official & Credible Sources


    Enjoyed This Guide? Explore Related Virginia Touring Resources:

    1. Battery Maintenance: Manage auxiliary electrical draws from touring gear using motorcycle battery care and troubleshooting in cold and hot weather touring.
    2. Chain Care Guide: Maintain smooth drive-line power under heavy payload with how to clean adjust and lube your motorcycle drive chain on long road trips.
    3. Tire Pressure Guide: Adjust rubber inflation specs for luggage loads in motorcycle tire pressure and tread maintenance for mountain curves and slick asphalt.
    4. Jacket Selection: Dress for shifting touring weather with textile vs leather motorcycle jackets for virginia climate.
    5. Rider Friendly Lodging: Find accommodations with easy unloading access in top motorcycle friendly hotels and b&bs in virginia.


  • Mastering Motorcycle Battery Performance in Any Weather

    Mastering Motorcycle Battery Performance in Any Weather

    Touring across unpredictable climates exposes your motorcycle’s electrical system to severe thermal stress. Mastering motorcycle battery care and troubleshooting in cold and hot weather touring is vital for preventing stranded breakdowns on remote mountain passes or sun-baked highway shoulders. Freezing morning temperatures in high elevations reduce cranking amps and slow chemical reaction speeds inside the battery, while extreme summer heat accelerates internal fluid evaporation and grid corrosion. Understanding how AGM, Gel, and Lithium-ion batteries react to climate extreme ensures your starter turns over reliably every single morning.

    Battery Chemistry & Performance Metrics Across Climates

    Compare how different motorcycle battery technologies handle extreme temperature variances:

    Battery Chemistry TypeCold Weather Performance (32°F / 0°C)Hot Weather Performance (95°F / 35°C+)Maintenance & Life Expectancy
    AGM (Absorbed Glass Mat)Excellent cold-cranking amps (CCA); reliable startupResists internal vibration; moderate heat degradationSealed zero-maintenance; 3–5 year lifespan
    Lithium-Ion (LiFePO4)Requires pre-heating (light draw) in freezing weatherExceptional thermal tolerance; slow dischargeUltra-lightweight; requires specialized charger
    Conventional Flooded (Wet Cell)Reduced cranking capacity; electrolyte gel riskHigh fluid evaporation rate; plate sulfation riskRequires distilled water tops; 2–3 year lifespan

    Essential Field Battery Care & Troubleshooting Steps

    Applying precise electrical maintenance procedures before and during long highway journeys preserves battery life:

    • 1. Measure Resting and Cranking Voltage:
      Use a compact digital multimeter to test battery health. A fully charged 12-volt battery should measure 12.6V to 12.8V DC at rest. When cranking the engine, voltage should not drop below 9.6V. If resting voltage reads below 12.0V, charge the battery immediately using a smart trickle charger.
    • 2. Warm Up Lithium Batteries in Cold Weather:
      Lithium (LiFePO4) batteries experience temporary internal resistance in freezing morning temperatures. If the engine cranks slowly on cold starts, turn on your headlights or heated grips for 1–2 minutes before pressing the starter button. This gentle current draw warms up internal cells, restoring full cranking power.
    • 3. Inspect Terminals and Cable Connections:
      Vibration from long road trips loosens terminal bolts and causes corrosion layer buildup. Clean battery posts with a wire brush, tighten terminal screws firmly using a screwdriver, and apply a thin layer of dielectric grease to prevent white oxidation powder from blocking current flow.
    • 4. Emergency Jump-Starting Protocol:
      If your battery dies far from service stations, jump-start safely using a portable lithium jump-pack. If jumping from a car, keep the car engine turned off to prevent pushing excessive amperage through your motorcycle’s delicate voltage regulator/rectifier.

    Before embarking on multi-day touring routes, conduct a complete checkup of your electrical and mechanical systems using the complete pre-trip motorcycle maintenance guide. If your itinerary includes long highway runs, ensure your drivetrain is fully serviced with how to clean, adjust, and lube your motorcycle drive chain on long road trips. Additionally, verify your tire safety parameters using motorcycle tire pressure and tread maintenance for mountain curves and slick asphalt.

    Conclusion: Reliable Power on Every Route

    Integrating motorcycle battery care and troubleshooting in cold and hot weather touring into your routine prevents frustrating electrical failures. Carry a compact multimeter, dielectric grease, and a portable mini jump-pack in your saddlebags. By monitoring voltage levels and maintaining tight, clean connections, your engine will fire up instantly whether parked on a chilly mountain ridge or beneath scorching summer sun.

    Legal Disclaimer: This guide is provided for educational and maintenance evaluation purposes only. Always consult your motorcycle owner’s manual for specific battery specifications and charging limits.

    Official & Credible Sources


    Enjoyed This Guide? Explore Related Virginia Touring Resources:

    1. Chain Care Guide: Maintain smooth power delivery using how to clean adjust and lube your motorcycle drive chain on long road trips.
    2. Tire Maintenance: Check rubber contact patch dynamics in motorcycle tire pressure and tread maintenance for mountain curves and slick asphalt.
    3. Jacket Selection: Prepare for extreme weather shifts with textile vs leather motorcycle jackets for virginia climate.
    4. Boot Comparison: Protect your feet in wet and cold conditions with best motorcycle boots for mountain and coastal touring waterproofing vs breathability.
    5. Rider Friendly Lodging: Plan comfortable overnight stops with garage charging access in top motorcycle friendly hotels and b&bs in virginia.
  • How to Clean, Adjust, & Lube a Motorcycle Chain on Road Trips (2026)

    How to Clean, Adjust, & Lube a Motorcycle Chain on Road Trips (2026)

    Covering hundreds of consecutive highway miles across Virginia exposes your motorcycle’s final drive system to continuous stress, rain spray, and pavement grit. Knowing how to clean, adjust, and lube your motorcycle drive chain on long road trips is essential for preventing premature sprocket wear, power loss, and catastrophic chain snapping. Rain showers wash away protective lubricant, while road grime turns residual grease into an abrasive grinding paste. Incorporating a 15-minute chain maintenance routine into your daily evening pit-stop extends drive-train lifespan and guarantees smooth, responsive power delivery across mountain corridors.

    Drive Chain Maintenance Interval & Diagnostics

    Review recommended field maintenance intervals and tension specs for multi-day touring:

    Maintenance TaskRecommended Field IntervalKey Measurement / SpecPrimary Warning Sign
    Chain LubricationEvery 300–500 Miles / After RainThin coat on inner roller platesMetallic squeaking & visible rust spots
    Deep Chain CleaningEvery 1,000–1,500 MilesKerosene or O-ring safe cleanerHeavy black sludge build-up on rollers
    Slack AdjustmentInspect Daily / Adjust as Needed1.0 to 1.5 inches (25–35mm) free playSlapping noise on deceleration / stiff tight spots
    Sprocket InspectionEvery 1,000 MilesSymmetrical tooth profileHooked, sharp, or shark-fin tooth wear

    Step-by-Step Field Chain Maintenance Guide

    Executing field chain service requires minimal compact tools kept in your saddlebags:

    • 1. Measure Chain Slack Accurately:
      Park your motorcycle on a flat surface using a centerstand or portable trail-jack. Find the midpoint on the lower chain run between the front and rear sprockets. Push the chain up and down with a ruler; total vertical movement should typically measure between 1.0 and 1.5 inches (check swingarm sticker for exact OEM specs).
    • 2. Clean Off Road Grime and Old Grease:
      Spray an O-ring safe chain cleaner or kerosene directly onto the rollers. Use a compact 3-sided grunge brush to scrub away accumulated dirt and road salt. Wipe the chain completely dry with a shop towel to prevent solvent from breaking down fresh lubricant.
    • 3. Apply Chain Lube to Warm O-Rings:
      Apply lubricant immediately after finishing a ride while the chain is still warm. Spray the lube onto the inside edge of the lower chain run so centrifugal force pulls grease deeper into the X-rings/O-rings as you rotate the wheel. Wipe off excess lube to prevent fling onto your rear tire.
    • 4. Adjust Rear Axle Alignment:
      If chain slack exceeds limits, loosen the rear axle nut. Turn the left and right chain adjuster bolts evenly, referencing the swingarm alignment notches to keep the rear wheel straight. Tighten the axle nut to manufacturer torque specifications and re-check slack.

    Before setting out on long-distance mountain tours, inspect your tire condition and pressure alongside your chain using motorcycle tire pressure and tread maintenance for mountain curves and slick asphalt. Ensure your overall mechanical setup is road-ready with the complete pre-trip motorcycle maintenance guide. Additionally, review weather precautions in essential rain gear and wet-weather riding tips for motorcyclists.

    Conclusion: Smooth Power, Long-Distance Reliability

    Mastering how to clean, adjust, and lube your motorcycle drive chain on long road trips protects your investment and prevents frustrating roadside breakdowns. By packing a portable trail-jack, compact brush, and travel lube, you can perform quick daily maintenance at your hotel or campsite. Keep your chain clean, correctly tensioned, and properly lubricated to enjoy smooth acceleration across Virginia’s scenic highways.

    Legal Disclaimer: This guide is provided for educational and basic maintenance purposes only. Always consult your motorcycle owner’s manual for exact torque values and chain slack tolerances.

    Official & Credible Sources


    Enjoyed This Guide? Explore Related Virginia Touring Resources:

    1. Tire Maintenance Guide: Pair chain care with tire checks in motorcycle tire pressure and tread maintenance for mountain curves and slick asphalt.
    2. Jacket Selection: Protect yourself during maintenance rides with textile vs leather motorcycle jackets for virginia climate.
    3. Boot Selection: Choose durable riding boots with best motorcycle boots for mountain and coastal touring waterproofing vs breathability.
    4. Helmet Comparisons: Ensure a quiet ride with modular vs full-face helmets for mountain touring safety comfort and noise comparison.
    5. Rider Lodging: Find stays with garage space for maintenance in top motorcycle friendly hotels and b&bs in virginia.
  • Motorcycle Tire Pressure & Tread Guide for Mountain Curves (2026)

    Motorcycle Tire Pressure & Tread Guide for Mountain Curves (2026)

    Carving through technical mountain switchbacks like the Back of the Dragon or leaning into tight curves along wet valley highways requires total reliance on two small contact patches. Proper motorcycle tire pressure and tread maintenance for mountain curves and slick asphalt is the single most critical safety factor separating smooth traction from sudden low-side slides. Temperature fluctuations, steep elevation changes, and wet pavement drastically affect tire carcass flex, heat buildup, and water evacuation. Maintaining precise cold inflation levels and monitoring rubber compound wear ensures your machine maintains maximum grip when leaning deep into mountain turns.

    Tire Pressure & Tread Performance Metrics

    Review how inflation levels and tread depth directly influence handling and wet traction:

    Maintenance MetricUnder-Inflated TireCorrect Cold Inflation (OEM Spec)Over-Inflated Tire
    Contact Patch SizeOverly wide; heavy, sluggish steeringIdeal shape; predictable cornering gripReduced footprint; harsh, skittish ride
    Carcass Heat BuildupExcessive internal heat & uneven cuppingBalanced thermal buildup & tread lifeMinimal heat; rubber stays too cold for grip
    Wet Road HydroplaningTread grooves distort; poor water clearingMaximum siping channel water evacuationRigid carcass; reduced rubber compliance
    Rim & Sidewall SafetyVulnerable to rim damage on potholesFull structural sidewall supportIncreased risk of puncture from debris

    Essential Tire Care for Technical Riding

    Executing proper tire maintenance before hitting technical corridors protects your traction across shifting pavement surfaces:

    • 1. Measure Pressure Cold Before Every Ride:
      Always check tire pressure with an accurate digital gauge when the tires are cold (before riding or after sitting for at least three hours). As you ascend mountain passes, ambient temperatures drop while tire internal air expands during hard cornering. Adjust inflation strictly to your motorcycle manufacturer’s cold PSI recommendations.
    • 2. Inspect Tread Depth and Wear Indicators (TWIs):
      Tires feature Wear Bar Indicators molded inside the tread grooves. Once tread wears down to 2/32 of an inch (1.6mm), the tire loses its ability to channel standing water, drastically increasing hydroplaning risks on wet asphalt. Replace tires before reaching these wear bars for mountain touring.
    • 3. Check for Tread Cupping and Edge Feathering:
      Hard trail-braking into mountain curves and aggressive acceleration out of turns can cause “cupping” or uneven scalloping on the sides of the front tire. Cupped tires create unsettling handlebar vibrations when leaning and reduce contact patch stability.
    • 4. Inspect for Dry Rot, Cracking, and Age:
      Even tires with deep tread can fail if the rubber compound hardens with age. Inspect sidewalls for fine cracking or weather checking. Rubber compounds over five years old lose their chemical grip capabilities on slick wet surfaces.

    Before embarking on multi-day mountain tours, perform a comprehensive inspection of your wheel bearings and suspension setup using the complete pre-trip motorcycle maintenance guide. If your route passes through rainstorms, review our wet-weather safety tips in essential rain gear and wet-weather riding tips for motorcyclists. Furthermore, ensure your tire setup complies with state highway regulations in Virginia motorcycle laws 2026 helmets lane splitting and regulations.

    Conclusion: Traction Begins at the Rubber

    Dedicating a few minutes to motorcycle tire pressure and tread maintenance for mountain curves and slick asphalt pays massive dividends in safety and cornering confidence. Proper inflation preserves your contact patch, while deep tread siping channels water away on rain-soaked backroads. Keep a reliable pressure gauge in your tank bag, inspect your tread regularly, and enjoy precise, stable cornering across Virginia’s premier mountain routes.

    Legal Disclaimer: This guide is provided for educational and maintenance planning purposes only. Always consult your motorcycle owner’s manual and tire manufacturer guidelines for official inflation pressures and load ratings.

    Official & Credible Sources


    Enjoyed This Guide? Explore Related Virginia Touring Resources:

    1. Jacket Selection: Pair your tire setup with weather-matched armor in textile vs leather motorcycle jackets for Virginia variable climate.
    2. Boot Protection: Maintain precise foot control on slick stops with best motorcycle boots for mountain and coastal touring waterproofing vs breathability.
    3. Helmet Optics: Ensure clear vision through mountain mist using modular vs full-face helmets for mountain touring safety comfort and noise comparison.
    4. Mountain Curve Routes: Test your tire grip on 320 switchbacks with our Virginia State Route 16 complete riding guide to the Back of the Dragon.
    5. Scenic Valley Loops: Enjoy smooth asphalt touring along the Shenandoah Valley motorcycle loop scenic waypoints and stops.

  • Textile vs Leather Motorcycle Jackets for Virginia Weather (2026)

    Textile vs Leather Motorcycle Jackets for Virginia Weather (2026)

    Riding across Virginia exposes motorcyclists to significant atmospheric contrasts. A single day’s ride can begin in chilly, morning mountain mist along Skyline Drive and end in humid afternoon heat across the Tidewater coastal plains. Protecting yourself against both road abrasion and rapid weather shifts requires careful gear selection. The debate between textile vs leather motorcycle jackets for Virginia’s variable climate comes down to balancing classic abrasion safety with multi-season thermal adaptability. Understanding how modern synthetic textiles and traditional cowhide leather handle moisture, ventilation, and impact armor ensures you stay comfortable and fully protected in any season.

    Technical Performance Metrics: Textile vs. Leather

    Review how each jacket construction performs across Virginia’s distinct weather conditions:

    Performance CharacteristicTextile Touring Jacket (Cordura/Gore-Tex)Leather Riding Jacket (Cowhide/Goat)
    Abrasion ResistanceHigh (500D–1000D Cordura standards)Superior (Natural tensile fiber density)
    Waterproofing & RainBuilt-in waterproof membranes & sealed zipsAbsorbs water; requires separate rain outer shell
    Climate AdaptabilityRemovable thermal liners & direct-vent zippersHeavier; limited air ventilation in humid heat
    Maintenance NeedsMachine washable; quick-drying synthetic fabricRequires leather conditioner & specialized care

    Key Factors for Virginia Climate Riding

    Evaluating physical properties helps determine which jacket style fits your seasonal touring route:

    • 1. Abrasion Resistance and Impact Safety:
      Leather remains the gold standard for pure slide protection due to its high tensile strength and natural resistance to friction tearing. However, high-density synthetic textiles like 1000D Cordura and Kevlar blends offer exceptional abrasion ratings that meet rigorous CE Level 2 safety standards while keeping the garment significantly lighter.
    • 2. Moisture Management and Rain Protection:
      Virginia is known for sudden afternoon thunderstorms. Modern textile jackets feature laminated waterproof membranes (like Gore-Tex or Drystar) that keep rain out completely while allowing sweat vapor to escape. Raw leather absorbs rainwater, becoming heavy, cold, and slow to dry out overnight.
    • 3. Temperature Control and Airflow:
      During hot Tidewater summers, textile jackets with zippered mesh intake and exhaust vents allow direct airflow across your core. Leather jackets offer excellent windblocking insulation for cold spring and autumn mountain rides, but can overheat quickly in slow-moving summer traffic.
    • 4. Versatility for Multi-Day Touring:
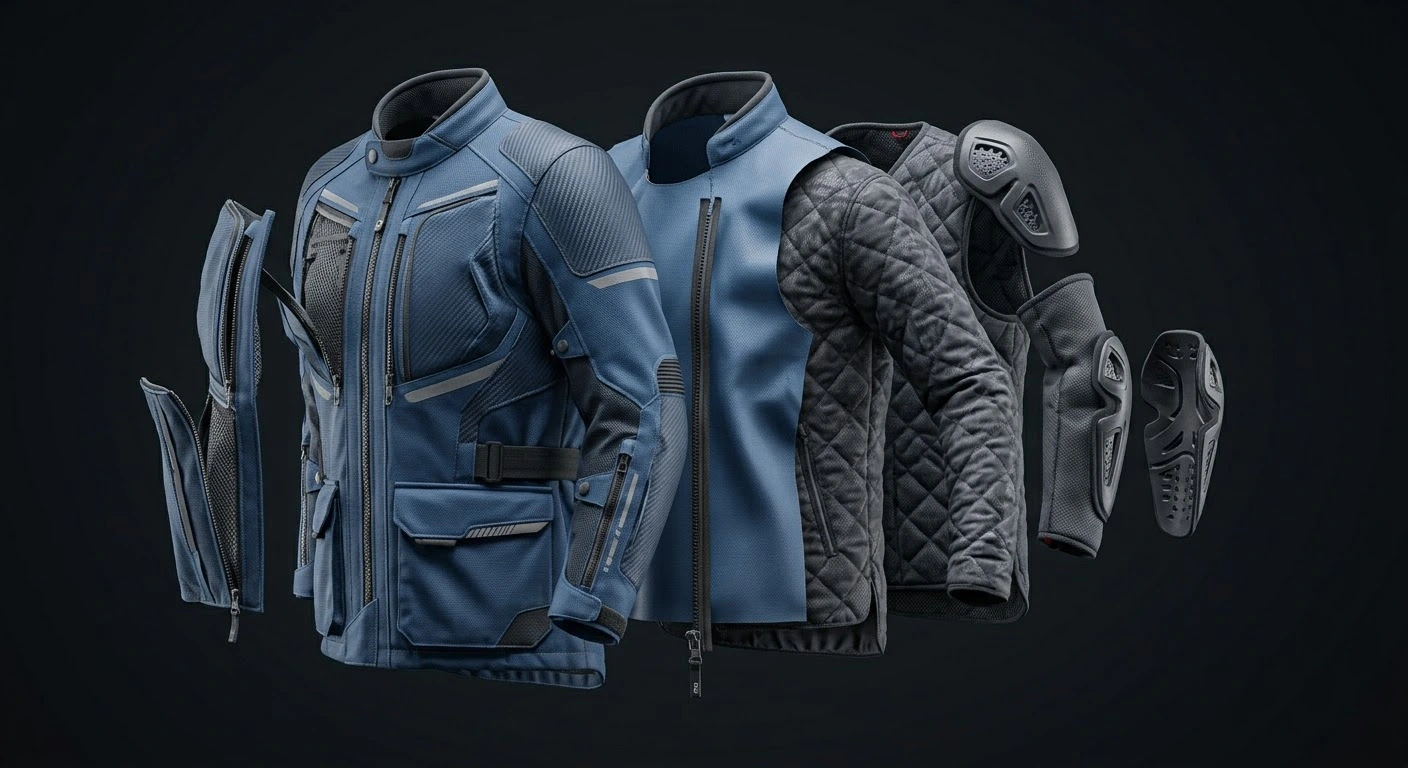
      A three-layer textile jacket—featuring an outer shell, removable waterproof liner, and removable thermal liner—can handle a 40-degree morning temperature drop in the mountains without requiring extra bulky gear in your panniers.

    Before setting out on multi-day highway journeys, ensure your bike is prepped for all weather conditions using the complete pre-trip motorcycle maintenance guide. If your itinerary crosses rainy mountain passes, review our recommendations in essential rain gear and wet-weather riding tips for motorcyclists. Additionally, verify that your riding gear complies with state safety rules in Virginia motorcycle laws 2026 helmets lane splitting and regulations.

    Conclusion: Choose the Right Armor for Your Ride

    Both textile and leather jackets offer distinct advantages for riding through the Commonwealth. If you prioritize maximum abrasion resistance and classic aesthetic style for cool, fair-weather riding, a quality leather jacket is an outstanding choice. If your tours span multiple days, changing elevations, and sudden rainfall, a versatile textile touring jacket provides the all-weather protection and ventilation needed for Virginia’s unpredictable climate.

    Legal Disclaimer: This guide is provided for educational and equipment-evaluation purposes only. Always verify that riding jackets include certified CE Level 1 or Level 2 armor at the shoulders, elbows, and back.

    Official & Credible Sources

    • European Committee for Standardization (CEN) — EN 17092 Protective Motorcycle Garments Standard: https://www.cen.eu
    • Cordura Advanced Fabrics — Synthetic Abrasion Resistance Data: https://www.cordura.com
    • Motorcycle Safety Foundation (MSF) — Riding Gear Selection & Safety Tips: https://msf-usa.org

    Enjoyed This Guide? Explore Related Virginia Touring Resources:

    1. Touring Boot Selection: Pair your jacket with climate-matched boots in best motorcycle boots for mountain and coastal touring waterproofing vs breathability.
    2. Helmet Comparison: Find the ideal lid for your jacket setup in modular vs full-face helmets for mountain touring safety comfort and noise comparison.
    3. Quiet Touring Lids: Learn more about sound isolation in the best motorcycle helmets for long-distance touring quietness ventilation and bluetooth integration.
    4. Coastal Highway Routes: Cruise the eastern shoreline with proper gear in scenic coastal motorcycle routes in Eastern Virginia and Tidewater.
    5. Rider-Friendly Lodging: Find accommodations with gear-drying amenities in top motorcycle friendly hotels and B&Bs in Virginia.

  • Best Motorcycle Helmets for Long-Distance Touring (2026 Guide)

    Best Motorcycle Helmets for Long-Distance Touring (2026 Guide)

    Embarking on a multi-day highway journey across Virginia’s vast mountain corridors or coastal byways requires unwavering focus and comfort. While engine performance and suspension setup get most of the attention, your helmet is the single most critical piece of personal gear affecting fatigue. Finding the best motorcycle helmets for long-distance touring quietness ventilation and bluetooth integration means the difference between finishing a 500-mile day feeling refreshed or suffering from severe neck strain and deafening wind noise. A high-performance touring helmet must balance aerodynamic noise suppression, multi-port airflow, and seamless intercom housing without compromising structural safety standards.

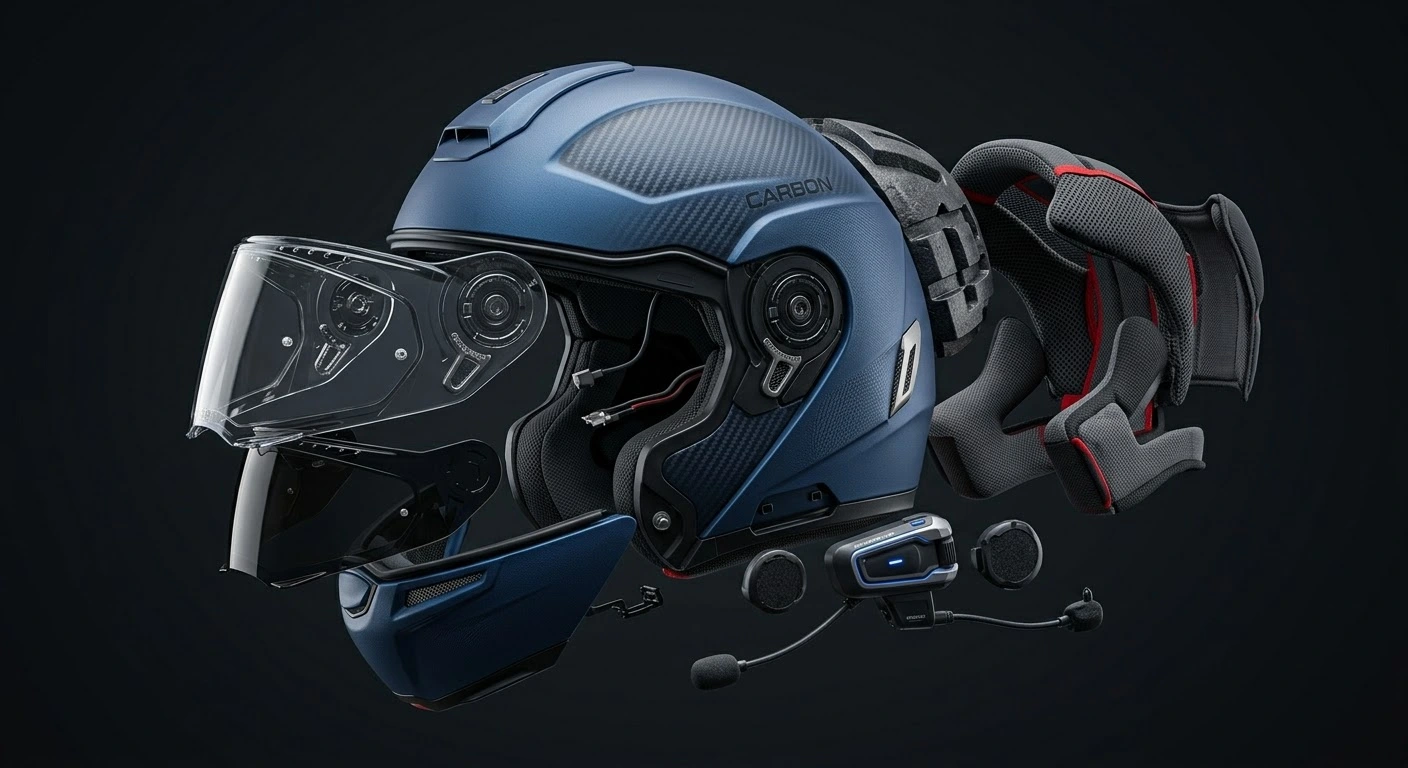
    Touring Helmet Features & Performance Metrics

    When evaluating long-distance touring helmets, consider how these core features impact ride comfort and acoustic isolation:

    Touring Helmet FeaturePrimary Touring BenefitKey Spec / Standard to Look For
    Acoustic Shell DesignReduces wind roar & neck strainSculpted aerodynamics & dense neck collar
    Multi-Port VentilationPrevents overheating & visor foggingChin intake, crown ports, & rear vacuum exhaust
    Bluetooth Comms CutoutsEliminates ear pressure pointsDeep EPS speaker pockets & wire channels
    Internal Sun ShieldInstant glare protection without stoppingDrop-down UV400 retractable inner visor

    Key Features of Superior Long-Distance Touring Helmets

    When selecting a lid built for hundreds of consecutive highway miles, prioritize these four core engineering elements:

    • 1. Advanced Aerodynamics and Acoustic Insulation:
      Touring helmets utilize specialized shell sculpting and neck roll collars to channel high-speed airflow smoothly over the helmet. This reduces wind buffeting at highway speeds and drastically cuts down low-frequency wind roar that causes long-term hearing fatigue.
    • 2. Multi-Channel Climate Control Ventilation:
      Long days in the saddle mean facing freezing morning mountain passes and scorching afternoon valley traffic. Look for helmets featuring chin vents that force air across the inner visor face to prevent fogging, combined with crown intake ports and rear vacuum exhaust vents.
    • 3. Integrated Bluetooth Intercom Recesses:
      Modern touring demands seamless communication and navigation. The best helmets feature pre-molded speaker cutouts within the EPS foam liner, dedicated wire routing channels, and aerodynamic mounting locations for popular intercom units.
    • 4. Drop-Down Internal Sun Shields:
      Riding east into morning glare or heading west into sunset requires immediate eye protection. An internal, drop-down sun visor allows you to adapt instantly to changing light conditions without stopping to swap face shields.

    Helmet Safety Standards & Legal Compliance in Virginia

    Beyond comfort and noise reduction, your helmet must satisfy strict impact protection standards:

    • DOT and ECE 22.06 Certifications: Ensure your helmet carries clear DOT (Department of Transportation) compliance stamps and ideally meets the rigorous ECE 22.06 testing standard for rotational impact safety.
    • Proper Fitment to Prevent Fatigue: A loose helmet shifts in crosswinds, while a tight helmet creates painful forehead pressure points within two hours. Measure your head circumference accurately and test fitment with your riding balaclava or earplugs.

    Before packing your bags for multi-day highway tours, ensure your motorcycle is mechanically prepared using the complete pre-trip motorcycle maintenance guide. If you ride with a passenger, review our communication and safety recommendations in pillion passenger comfort and safety tips for two-up motorcycle touring. Additionally, double-check that your helmet meets state law requirements by reading Virginia motorcycle laws 2026 helmets lane splitting and regulations.

    Conclusion: Invest in Quiet, Riding Comfort

    Selecting the best motorcycle helmets for long-distance touring quietness ventilation and bluetooth integration is an investment in your safety, focus, and overall riding pleasure. By prioritizing noise suppression, multi-vent airflow, and built-in intercom integration, you ensure every long-distance tour across Virginia remains a comfortable, memorable adventure.

    Legal Disclaimer: This guide is provided for educational and safety planning purposes only. Helmet fitment and noise isolation vary based on individual head shapes and motorcycle windshield setups; always test fit helmets prior to long trips.

    Official & Credible Sources

    • Snell Memorial Foundation — Helmet Safety Standards & Testing: https://www.smf.org
    • ECE 22.06 Helmet Safety Regulations — European Economic Commission Standards: https://unece.org
    • National Highway Traffic Safety Administration (NHTSA) — Motorcycle Helmet Safety Standards: https://www.nhtsa.gov

    Enjoyed This Guide? Explore Related Virginia Touring Resources:

    If you are gearing up for long-distance highway travel, check out these closely related equipment and planning guides:

    1. Helmet Intercom Reviews: Compare top helmet communication tech in Cardo vs Sena choosing the best motorcycle intercom for group rides.
    2. State Helmet Regulations: Stay compliant with helmet laws using Virginia motorcycle laws 2026 helmets lane splitting and regulations.
    3. Long-Distance Packing & Prep: Get your bike ready for long miles with how to prepare your motorcycle for long-distance touring.
    4. All-Weather Gear Selection: Stay dry under your helmet by reading essential rain gear and wet-weather riding tips for motorcyclists.
    5. Rider-Friendly Overnight Stays: Find lodging with secure helmet storage in top motorcycle friendly hotels and B&Bs in Virginia.